This post may contain affiliate links. Read my Disclosure Policy to learn more.
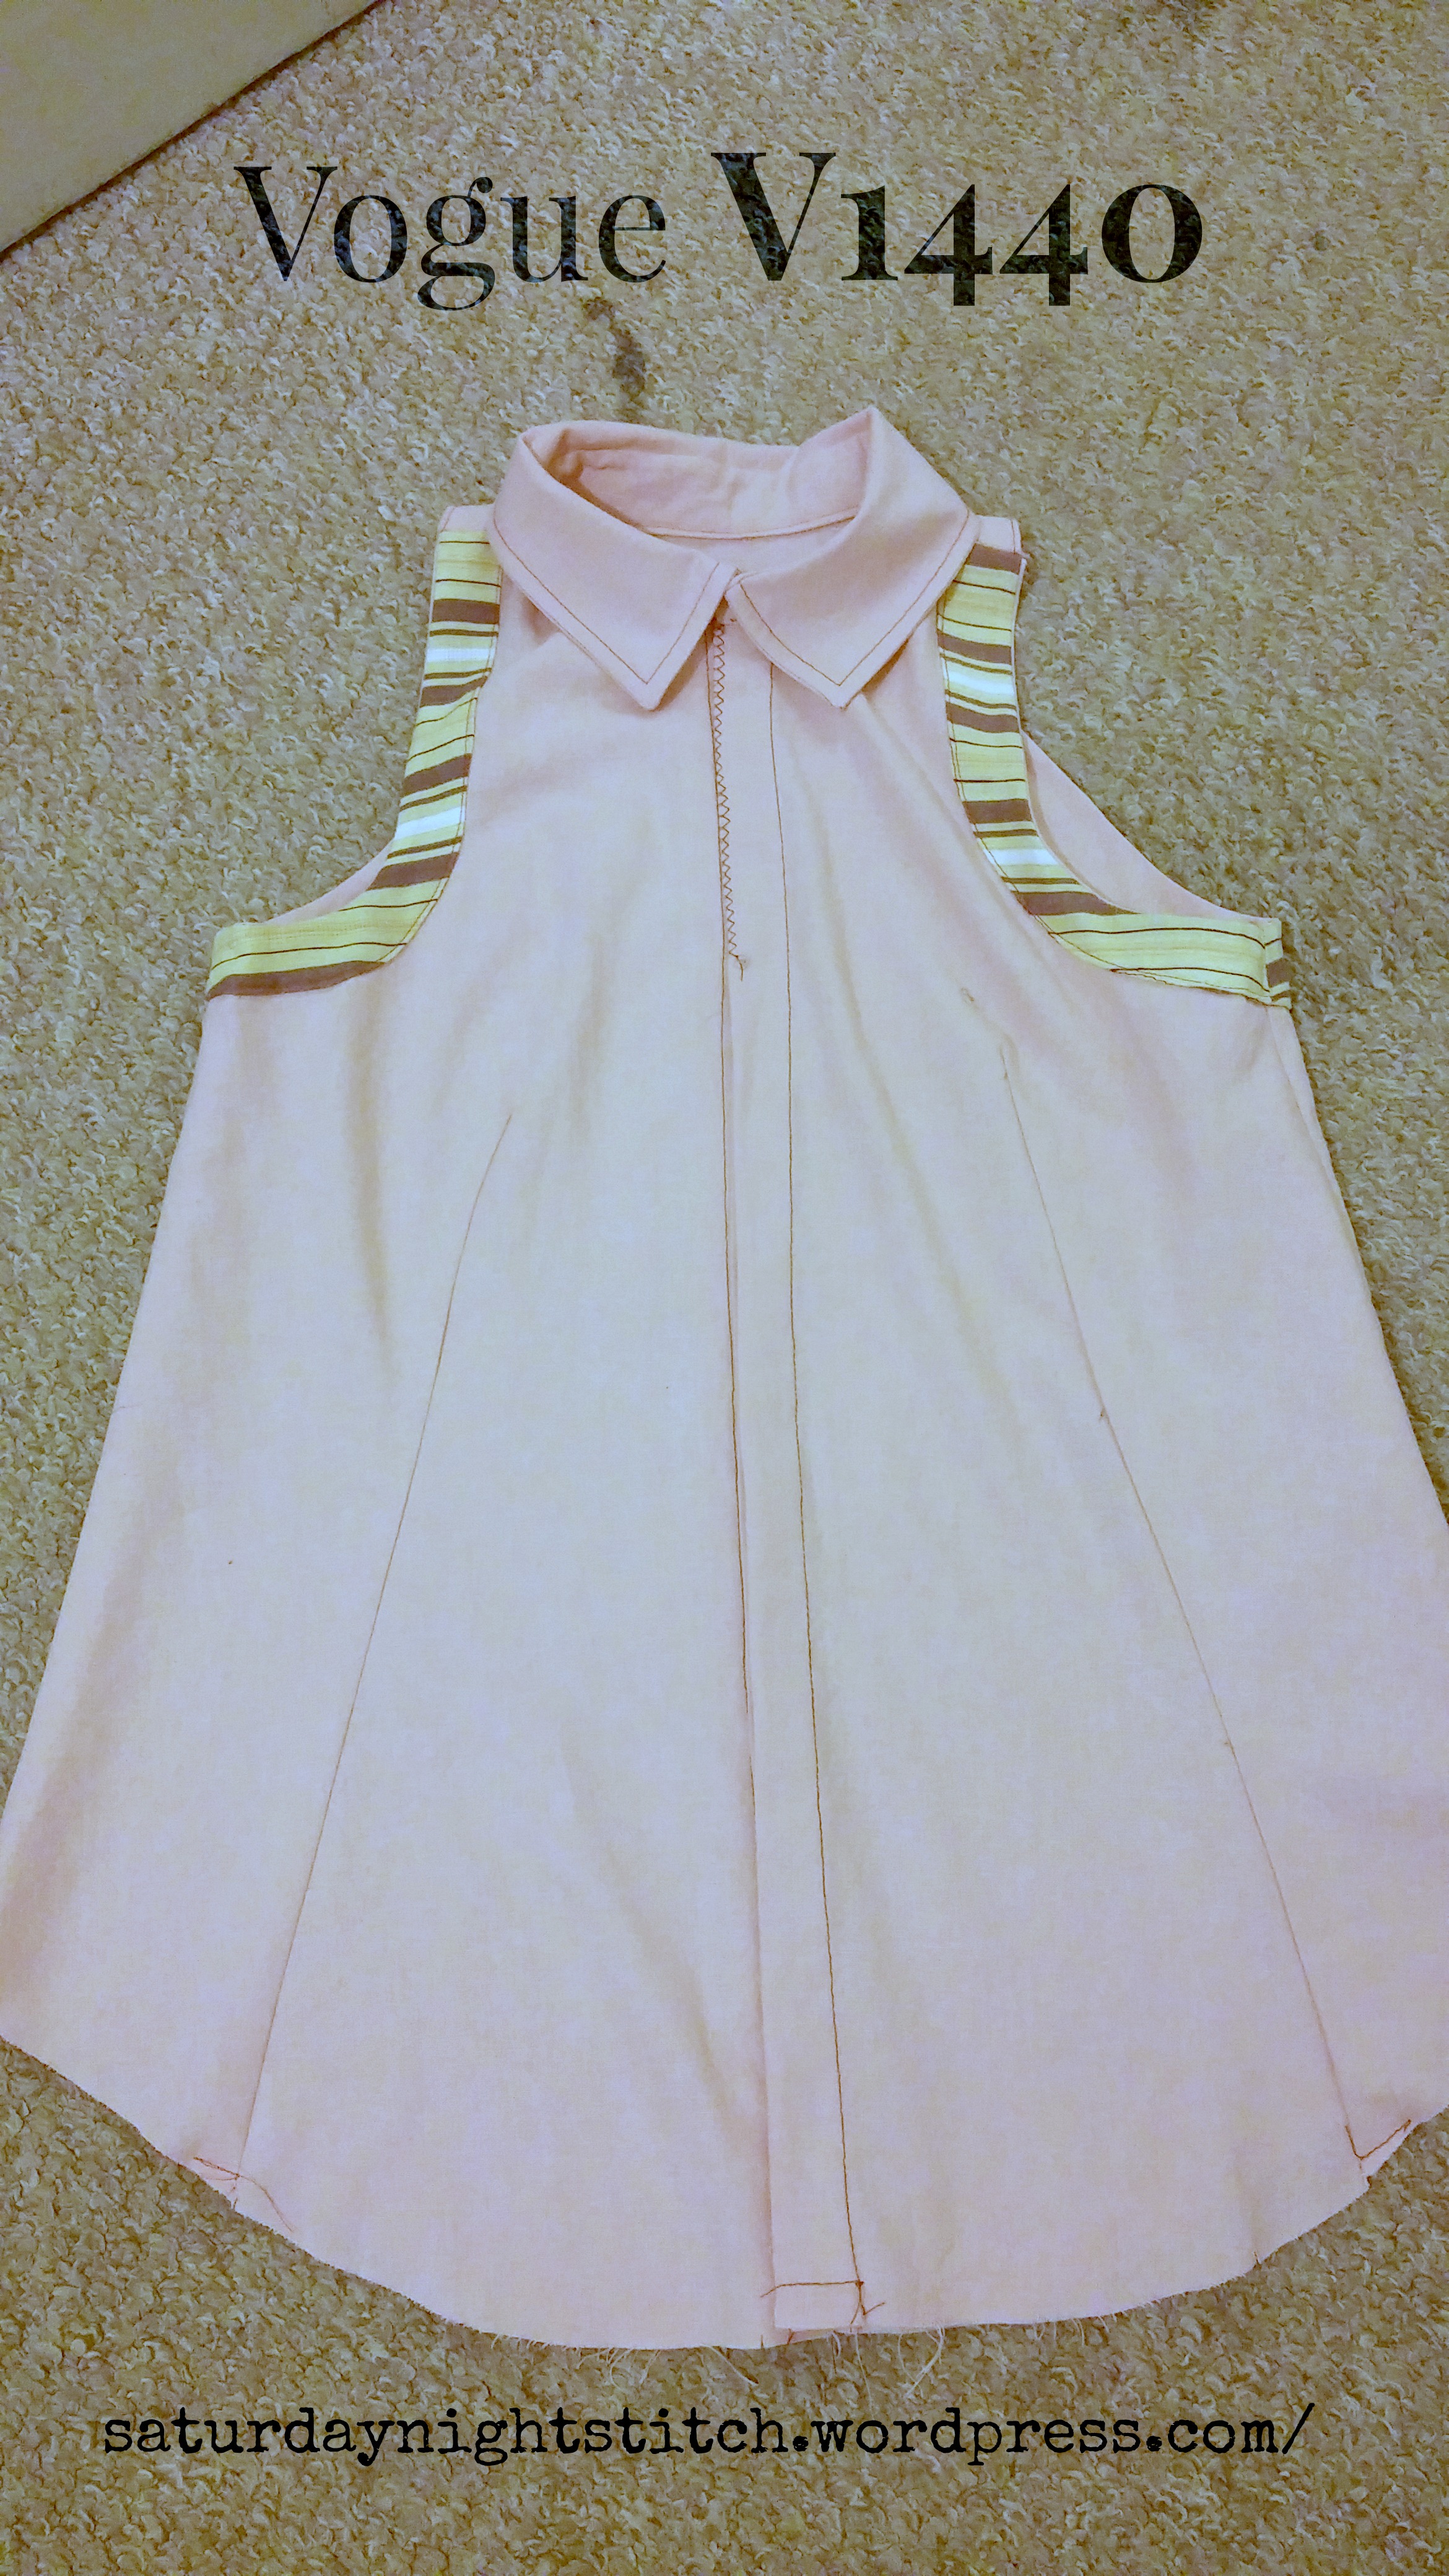
Hello everyone!This is a super quick ‘Notebook’ style post. Its to post my notes on processes etc so I don’t loose them. I have a bad habit of writing adjustments on the nearest writing place and I always end up loosing the notes! Grrr!!!. So anyway this is a work in progress on Vogue V1440. I did a post on the new Vogue spring patterns and mentioned how I loved V1440. I had to wait a few more weeks before they were available here in the UK. When it arrived I was petrified. What my made me think I could make a shirt with such complex details? A triangle yoke!

Vogue V1440 View A
Points to remember,
1. Coral linen for the muslin. Linen was very thick on the the french seams and the fly front.
2. The collar was constructed under the helpful dulcet tones of Pam Howard’s Tailored Shirt Craftsy class. It was so helpful. This my first collar = can you believe how professional it looks! I cant believe I did this on my first go. That class is easily my favourite! <I am not paid to say this, I bought this class last year during Black Friday>
3. I mixed up my front pieces and somehow ended up with the buttons and buttonholes on the wrong side. Women button towards the heart and men away from the heart….mine buttons away. I have to really watch out for this because the two front pieces are cut separately.
4. I also need to remember when topstitching the collar to make sure that the upper collar is facing up so its neater.
5. I fudged the point on the yoke triangle but not bad for a first go. I need to read up on sewing perfect points.
Fit
The fit is very very loose. By the measurement chart I should have cut a size 14 but when I looked at the pattern to see what the waist and bust measurements of the completed garment would be – I needed to cut an 8. Being prudent and fearing mistakes, I cut a 10 instead. It was still too loose fitting for my liking with some armhole gaping. So I took off 6/8 inch at the sides and the sides and that eliminated the armhole gaping.
I didn’t bother with finishing he hem but I will on my next muslin.
Adjustments to side seams made, back pieces traced and front pieces folded in at side seams. Work has begun on a second muslin.
I do like the construction order. Its very neat and thorough. I absolutely loved every second of making this up. Steam and heat were my friends on this one – I love linen for its response to a hot iron 😉
As always happy sewing everyone!


chuichoy
March 4, 2015 1:45 amHaha I also write down notes and lose them. Shame that this one was too big because the collar and the coral color looks so nice
Hila
March 4, 2015 11:36 amThank you! The coral is a lovely colour but it clashes horrible with my skin tone 😢. So now I am using it up to make muslins. The collar was fun to make.
Linda of Nice dress! Thanks, I made it!!
March 4, 2015 3:25 amSorry – I am so happy that someone else besides me has put her buttons and buttonholes on the “wrong” side. I did a Craftsy course with a beautiful, perfectly executed Jean jacket, made out of some prized flowered denim…. I put my buttons and buttonholes on the “wrong” side. Too bad! Heck with the rules, I say! Your blouse looks lovely! I like the contrasting fabric and the pattern is so unique! Good job!
Hila
March 4, 2015 11:41 amYes! To heck with the ‘rules’! I wear a lot of my husband’s shirts so I dont even know why I am bothered! It felt a little weird when it came to buttoning but I am used to it 😀. Life becomes a little easier when you realise that the ‘rules’ are made up by people no smarter than yourself. Thanks Linda! You gave me perspective.
melbatron
March 4, 2015 6:59 amSuch an awesome top!!!
Hila
March 4, 2015 8:23 amWhy thank you!
Lesley King
March 4, 2015 7:30 amI’m cack handed and find that my natural inclination is to have buttons on the same side as men. Perhaps just tell people its a left handed shirt?
Hila
March 4, 2015 11:43 amI think I agree with what Linda said here! To heck with the rules! Does it button up? If the answer is Yes! Then its fine 😄.
Geo P
March 4, 2015 10:17 amI love this pattern too, but I’m not very comfortable with so much shoulder on display. I’m still thinking about it…
Your collar looks great for a first. I’ve always feared them and avoided garments with collars, but after I made a few I realised that they’re actually really easy to sew. I just need to pay attention to have the sides symmetric, cut the under collar smaller and topstitch evenly. A lot of attention, I agree, but still easy 🙂
Pam gives great advice in that class. I’ve just finished a shirt and her class helped me so much. I do need to listen on 1.5x speed though 😀
Hila
March 4, 2015 11:51 amThank you! It does show plenty of shoulder indeed. Lucky for me I have always thought of my shoulders as my best feature lol. As a child I had to grow into my shoulders and got teased a lot but by the time i became a teenager I came to the realisation that broad shoulders were distinguished😀. Pam’s class made me feel like she was rught there sitting next me talking me through it. Also like that she didnt edit out mistakes .
Natasha H
March 4, 2015 2:23 pmEverytime I go to the store for this pattern it’s sold out in my size! lol
Your muslin definitely showed me a lot of the style elements that I could not tell from the all white top on the model. I want it so much more now!
Hila
March 5, 2015 9:33 amThanks Natasha! I just finished the second muslin and will put up a post within a couple of days. Its definitely a pattern worth haveing 😉
navybluethreads
March 4, 2015 4:05 pmGreat looking collar, looking forward to seeing your next version.
Hila
March 4, 2015 4:46 pmThank you! I am really loving this pattern. I just finished it up this afternoon. Hopefully its still light when my photographer gets back from his day job and I can get pictures and blog it 😀.
teri dodds
March 4, 2015 11:08 pmThat is a really pretty shirt pattern. I love the triangle yoke detail. I’m looking forward to seeing your next one!
Hila
March 5, 2015 9:37 amThanks Teri! I will be posting the second muslin hopefully tonight; its nearly there!
mamalulu67
March 5, 2015 9:46 pmIt’s a cute pattern! Love what you are doing.